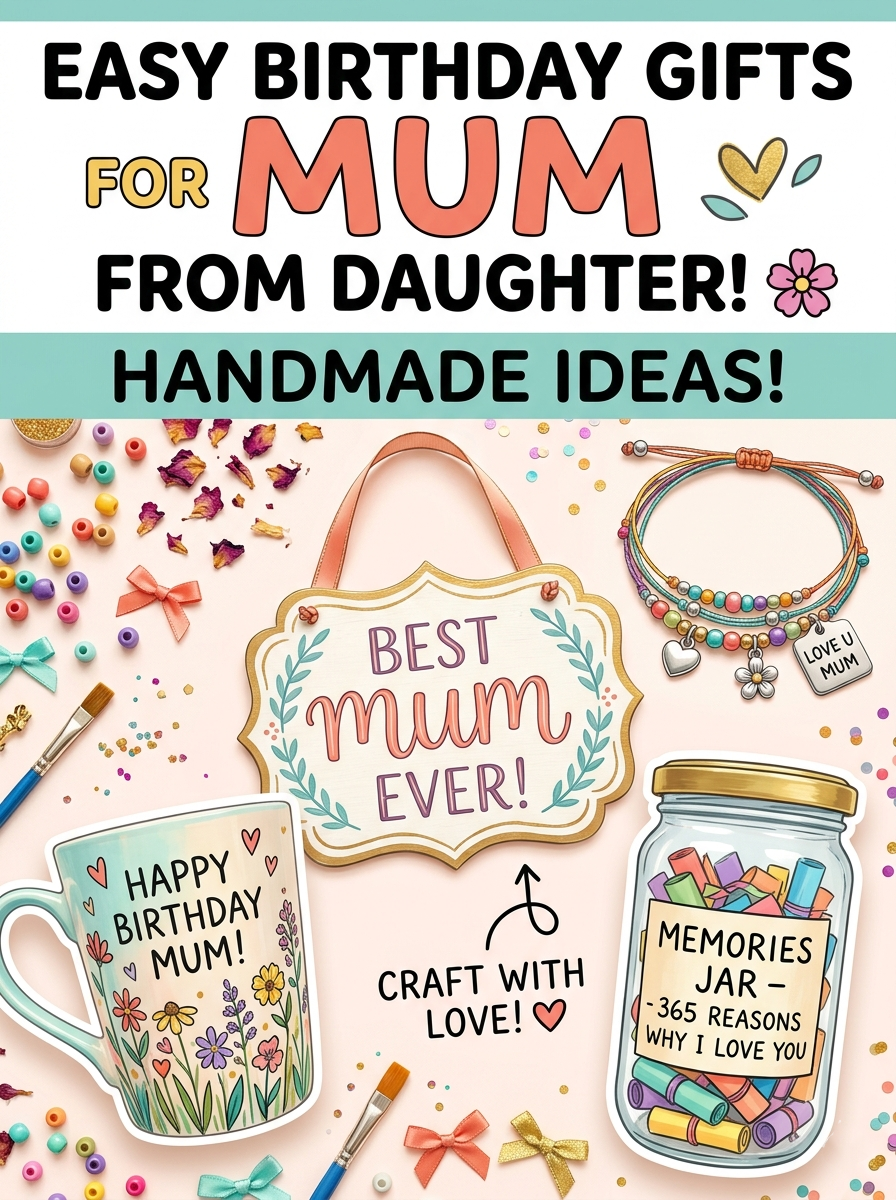
My mum keeps a small jar on her kitchen windowsill. It is filled with folded slips of paper — messages I wrote her years ago for one of her birthdays, each one a memory, a reason I love her, or something that made me laugh about the two of us. She has never thrown a single one away. I have given her more expensive presents since then. None of them sit on the windowsill.

Easy birthday gifts to make for mum from daughter (handmade ideas)
That taught me something I have not forgotten: handmade birthday gifts for mum land differently than bought ones. Not because they are cheaper — sometimes they genuinely are not, once you factor in materials and time — but because they carry something a shop cannot sell. The fact that you made it, that you sat down and thought about her specifically, is the gift itself as much as the object.
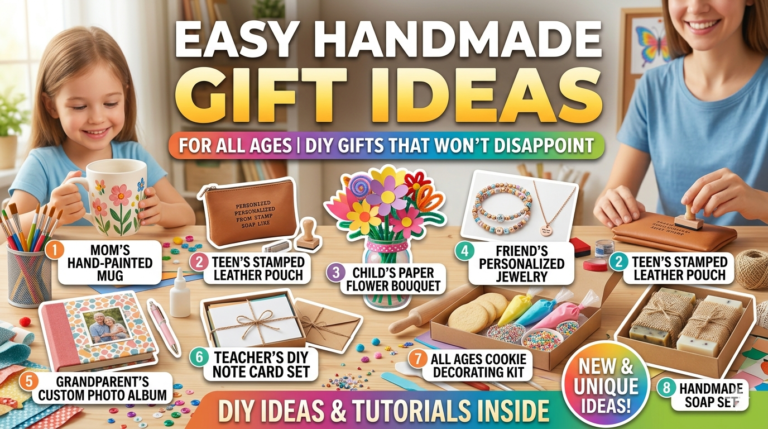
These are the eight handmade birthday gifts I would recommend to any daughter — from something you can make in twenty minutes with a jar and some paper, to something that takes a weekend and results in an heirloom she will keep for decades. I have included honest notes on difficulty, what you actually need, and the small details that make each one go from homemade to heartfelt.
Difficulty guide used in this article
⭐☆☆
Easy
No special skills, basic supplies, under 30 min
⭐⭐☆
Medium
A little patience needed, 30–90 min
⭐⭐⭐
Takes time
Worth the effort — results in something lasting
1. The Memory Jar ⭐☆☆
This is the jar on my mum’s windowsill. It costs almost nothing, takes about twenty minutes, and it is the gift I have seen produce the most genuine, overwhelmed reaction from mothers more than once. The concept is simple: you fill a jar with handwritten notes — memories, reasons you love her, funny shared moments, things she taught you — and she gets to pull them out one by one whenever she wants a smile.
What you need
- A clean glass jar with a lid — a mason jar, an old jam jar, or any jar that feels right
- Small slips of paper or card (cut up coloured card is lovely; plain paper works too)
- A pen with good ink — this is not the place for a scratchy biro
- Optional: ribbon tied around the jar neck, a small label with “Open when you need a smile”
How to make it
- Aim for at least 20 notes — more is better. Split them into categories in your head: funny memories, things she taught you, reasons you love her, things you are proud of her for, moments that made you both laugh
- Write one per slip. Keep them personal and specific — “the time we got lost in Portugal and ended up at that tiny restaurant” is a thousand times more powerful than “I love your sense of adventure”
- Fold each slip and fill the jar. If the jar looks sparse, layer in small dried flowers or coloured tissue between the notes
- Seal it, add a ribbon, and attach a tag that explains what it is
The detail that matters: Write about her specifically, not about what she does for you. Notes that say “I love how you always…” or “I will never forget the time you…” land far deeper than notes about what a great mum she is in general.
2. The Handwritten Family Recipe Book ⭐⭐☆
This one takes more time but produces something she will genuinely keep forever. The idea is to collect family recipes — hers, her mother’s, dishes that define your shared food history — and copy them out by hand into a beautiful notebook, with notes about the memories attached to each recipe.
What makes this different from just buying a cookbook is the layer of story. Next to a recipe for her lemon cake, you write two sentences about the first birthday she made it for you. Next to the Christmas soup, you write about the year everyone had seconds and your grandmother pretended not to notice.
What you need
- A hardcover notebook with blank or lined pages — something that feels special, not a school exercise book
- Fine-line pens in one or two colours (black with a second colour for titles looks clean and intentional)
- Washi tape, small stickers, or dried pressed flowers to decorate between pages (optional but lovely)
- Recipes — from her, from family members, from your own memory
How to make it
- Collect recipes in advance — ask other family members for ones she might not have written down, or dig out old cookbooks she has used for years
- Plan the layout in pencil first: recipe title at the top, ingredients, method, and then a short personal note at the bottom of each page
- Write in ink over the pencil when you are happy with the layout
- Add a handwritten dedication on the inside front cover — this is the most important page in the whole book
A useful tip from The Spruce Crafts: if your handwriting is not your strongest point, use a ruler for straight lines and take it one section at a time rather than rushing through pages. Slow, careful handwriting reads as thoughtful; rushed scrawl reads as an afterthought — even when the content is beautiful.
Looking for more handmade gift ideas beyond this list?
Our full handmade gift ideas guide covers creative options across every budget and skill level — from quick projects you can finish tonight to more involved makes worth planning a weekend around.
3. A DIY Pamper Hamper ⭐☆☆
This is not a gift basket thrown together from whatever is left on the shelf at the chemist. A genuinely thoughtful pamper hamper for mum is curated around what she actually loves — her preferred scent, her skincare routine, the bath products she always says she will buy herself but never does.
The handmade element here is in the curation and presentation, not the products themselves — which makes this ideal if crafting is not your strong suit but you want to give something personal and beautiful.
What you need
- A wicker basket, wooden crate, or large tin — charity shops often have perfect ones for very little
- 3–6 products she would genuinely use: a bath soak, a good hand cream, a face mask, a candle in her favourite scent, a small bottle of her preferred essential oil
- Tissue paper or shredded paper to line and fill the basket
- Ribbon, a sprig of dried lavender, or a small seasonal flower to tie to the handle
- A handwritten card tucked inside explaining what each item is for and why you chose it
How to make it feel personal
- Think about one specific thing she has mentioned wanting or needing — this is more important than any product you choose
- Layer the tissue paper in two colours before placing items, so it creates a nest rather than just padding
- Place the tallest item at the back, smaller items at the front, so everything is visible
- The handwritten card inside is not optional — without it, this is just a gift basket. With a note that says “I know you never buy yourself nice bath things — I got these specifically for you,” it becomes something different
Spend a little more on one item than the rest. One genuinely lovely candle or a proper hand cream sits better than six cheap things. Quality anchors the whole basket.
4. A Curated Photo Print Display ⭐⭐☆
This works because most people’s favourite photos are trapped on phones, unseen. Printing a small collection of photographs — genuinely meaningful ones, chosen thoughtfully, not just the most recent ones from your camera roll — and presenting them beautifully is a gift that will end up on a wall or shelf and stay there for years.
What you need
- 4–8 photographs printed at a consistent size (10×15 cm or 13×18 cm works well for most frames) — many supermarkets and pharmacies offer same-day printing
- A multi-aperture frame, a small set of matching single frames, or a length of string and mini pegs for a hanging display
- Optional: a small handwritten label under each photo explaining when it was taken or why you chose it
How to make it
- Choose photos that span different chapters of her life — not just recent ones. A photo from your childhood together, one from a holiday, one with other family members she loves, one that made you both laugh
- If using a string display, cut the string to the right length, space the pegs evenly, and curl each photo slightly by wrapping it gently around a pen before pinning — they hang better than flat prints
- Wrap the finished display in tissue paper; frames can go in a gift bag with padding
- Include a note on the back of each photo, or on a single card, with the story behind each one
According to Good Housekeeping, photo gifts are consistently rated among the most sentimental presents adults receive — specifically because they require genuine thought and access to shared memories that no one else could replicate.
5. A Painted Plant Pot with a Succulent ⭐⭐☆
This is a gift that requires almost no artistic ability to look genuinely good — because simple geometric patterns, stripes, and dots on a terracotta pot look intentional and beautiful even when they are very straightforward to paint. Add a small succulent or plant and it becomes a living gift that she will see and water and think of you for months.
What you need
- A plain terracotta pot — any garden centre or pound shop carries these
- Acrylic paint in 2–3 colours that suit your mum’s home (white, sage green, and terracotta work universally; white and gold feel elegant)
- Small paintbrushes: one slightly wider for base coats, one fine for detail
- A small succulent, herb plant, or houseplant to go inside
- Sealant spray (optional but extends the paint life significantly)
How to make it
- If the pot is new, wipe it down and let it dry completely — paint does not stick well to dusty terracotta
- Paint a base coat if needed (white is a good base for brighter colours) and let it dry fully — 20–30 minutes
- Add your design: simple stripes, small dots using the end of a pencil dipped in paint, a geometric triangle pattern, or just one initial in a larger font painted freehand
- Once dry, spray with sealant if you have it — or brush on a thin layer of PVA glue diluted with water as an alternative
- Add the plant, wrap the pot in a square of kraft paper tied with twine, and it is done
Design tip: if you are nervous about painting freehand, use masking tape to create clean stripes or geometric shapes. Peel it off while the paint is still slightly damp and the edges will be sharp and professional-looking.
6. A Handmade Soy Candle in Her Favourite Scent ⭐⭐⭐
Candle-making sounds more complicated than it is. The basic version — soy wax, a fragrance oil, a wick, and a vessel — can be done in an afternoon with a beginner kit that costs around £10–15 online. The result is a candle that smells exactly the way she likes, in a vessel you chose for her, with a label you made yourself.
What you need
- Soy wax flakes (widely available online — a beginner bag makes 4–6 candles)
- Candle wicks with metal bases
- Fragrance oil in her preferred scent — lavender and vanilla are universally loved; citrus scents suit people who prefer something fresher
- A vessel: a clean glass jar, a ceramic mug, or a small teacup
- A double boiler or a heatproof jug inside a pan of water
- A thermometer (a cheap cooking thermometer works)
- A handmade label for the outside
How to make it
- Melt the soy wax in a double boiler over medium heat until fully liquid — this happens around 75–80°C
- Remove from heat and allow to cool to 60–65°C before adding your fragrance oil — adding at too high a temperature causes the scent to burn off
- Add fragrance oil at roughly 6–10% of the wax weight (most beginner guides recommend 8%) and stir gently for two minutes
- Secure the wick in the centre of your vessel using a small blob of the melted wax as glue; use a pencil across the top of the vessel to keep the wick centred while you pour
- Pour slowly and leave to set for at least 24 hours — do not move it or the wax will set unevenly
- Trim the wick to about 5mm before giving
The first candle you make is a test run. Make two or three at the same time — the technique is the same, the effort does not scale much, and you can choose the best one to give.
7. A Personalised Tote Bag ⭐⭐☆
A plain cotton tote bag costs almost nothing. Add a meaningful word, her initial, a simple illustration, or a quote she loves — using fabric markers or iron-on transfer paper — and it becomes something she will actually use every week rather than something that sits in a drawer.
Two methods depending on your skills
Fabric markers (easier, no equipment): Draw or write directly onto the fabric. Use a piece of card inside the bag to stop bleed-through. Set the ink by ironing over it with a cloth. Simple block letters, a botanical illustration, or just her initial inside a hand-drawn wreath look beautiful.
Iron-on transfer (cleaner finish, more precise): Design your image in any free design app — Canva works well — print it onto iron-on transfer paper, and iron it onto the bag following the transfer paper instructions. Mirror the image before printing if it contains text.
What to write or draw: her favourite quote, a word that describes her, the initial of her name inside a simple shape, coordinates of somewhere meaningful to both of you, or a line from a poem she loves.
8. Pressed Flower Art in a Frame ⭐⭐☆
Pressed flower art looks like something that belongs in a boutique gift shop, and the technique is genuinely simple. If you have access to a garden, a park, or even a bunch of flowers from a market, you have the main ingredient. The finished piece is something she can hang on a wall and keep indefinitely.
What you need
- Fresh flowers and foliage — wildflowers, ferns, lavender, pansies, and small roses all press beautifully
- Heavy books or a flower press (heavy books work perfectly)
- Watercolour paper or thick card for the background
- A simple clip frame or any frame the right size
- PVA glue or clear craft glue
- Optional: a small watercolour wash over the background before arranging the flowers
How to make it
- Press flowers 2–3 weeks before her birthday — place them between sheets of absorbent paper inside a heavy book and stack more books on top. Change the paper after 48 hours if the flowers were very fresh
- Once fully dried and pressed flat, arrange them on your background paper without gluing first — try different compositions until you are happy
- Glue each piece down carefully, holding it for a few seconds per flower
- Allow to dry completely before framing
You do not need many flowers to make a beautiful composition. Three or four blooms with a few leaves arranged asymmetrically looks more considered than a densely packed display.
How to Choose the Right Gift for Your Mum
Eight options is a lot, and the right one depends more on who your mum is than on what looks nicest. A few honest questions that help narrow it down:
- Is she a keeper or a minimal person? The memory jar, recipe book, and framed photo display are things to keep. The pamper hamper and candle are things to use. Both are valid — but they speak to different people.
- How much time do you have? The memory jar and pamper hamper can be done in an afternoon. The recipe book and pressed flower art need a week or two of advance planning.
- What does she always say she will buy herself but never does? That is usually the best gift regardless of which item it points to.
For more ideas across a wider range of budgets and relationships, our birthday gift guides cover both handmade and bought options sorted by occasion and personality.
The Finishing Touches That Make Any Handmade Gift Better
Whichever gift you make, these three things will make the final result more impactful:
Wrap it properly. A handmade gift in a plastic bag undermines the care you put into making it. Kraft paper, a ribbon, and a handwritten tag take five minutes and frame the whole thing as something intentional. Our easy craft ideas section includes simple wrapping and packaging tutorials that pair well with every gift above.
Write a real card. Not just “Happy Birthday, love [your name].” Something specific to her, to this year, to what she means to you. One honest sentence handwritten in a card will be remembered longer than any object you make. If you are unsure what to write, take five minutes with our birthday card message guide for ideas that feel genuinely personal rather than generic.
Give it to her before you talk yourself out of it. Handmade gifts sometimes come with a flutter of self-consciousness — what if it is not good enough, what if she does not like it. She will. The fact that you made it with her in mind, specifically for her, is the whole point. That comes through every time.
More from Warm Gifting
Keep exploring handmade gifts and creative ideas